Way back, within the days when paper charts have been treasured, navigators would sketch out the related particulars of their pocket book and take it on deck quite than danger the chart getting broken. Navigator’s notebooks have clean and lined pages because of this, so sketch maps aren’t a brand new concept.
Nevertheless, I believe a slight adjustment to the theme provides actual profit and ease, even when most of us navigate primarily from our on-deck chart plotters, though the rationale could also be barely totally different to what it as soon as was.
The Royal Marines (and the Military) nonetheless make three-dimensional fashions of the realm on the map they are going to be going to when giving ‘Orders’ (navy directions; look on-line for ‘mannequin pit’ to see what I imply) because it’s a great way to get everybody oriented.
Three-dimensional pondering
What I discovered was that if I ever needed to make the mannequin (which we needed to do typically on management programs), the topography of what I created out of mud and colored bits of ribbon typically stayed in my head for a surprisingly very long time. My take away wasn’t {that a} three-dimensional mannequin stays in your head longer than a two-dimensional map; however quite it was the bodily act of creating the mannequin that embedded the topography into my mind as a byproduct of what I used to be doing.
So for me, the actual profit of creating a pilotage plan sketch map shouldn’t be actually within the product (the sketch map). It’s within the making of it. I’d say 70% of the profit comes from going by way of the motions of creating it and simply 30% within the sheet of paper on the finish with the element on it.

Salcombe makes a stunning harbour that isn’t too tough, however getting in over the bar nonetheless calls for respect. Picture: Maciej Olszewski / Alamy Inventory Picture
Crucially, for me, it’s the least painful and best approach I do know to study an space sufficiently properly sufficient to have the ability to make a very first rate and properly thought out pilotage plan.
An issue with ‘chartplotter solely’ navigation is your ‘bubble of consciousness’ (a time period described to me by somebody well-known to you all) might be very restricted. Typically it might solely be so far as the sting of the display screen.
You’ll be able to typically get away with solely working this far forward a lot of the time, and other people do, but it surely does have its drawbacks. First you’re ‘mounted’ to the chart plotter needing to test the place you’re the entire time as a brand new little bit of the route comes into view (as poor navigators used to do coming up and all the way down to the chart desk repeatedly). If I do that, I additionally discover I must scroll backwards and forwards to look forward after which again to test that my place remains to be okay.

Learn the pilot guide to get your head across the massive image and the small print you want to take note of
Create an in depth thoughts map
As in all probability essentially the most succesful individual onboard, if I’m glued to the chartplotter, the wheel, or typically each, I can’t assist when it could be higher for the administration of the boat that I accomplish that. I discover this irritating and aggravating.
One approach to mitigate that is by meticulously scrutinising what’s on my route line as I plot it so I do know it’s at all times protected. Nevertheless, this does cut back my flexibility as I could also be reluctant to deviate from the protection it supplies. In open water this technique works. In congested areas it could not as a result of, as we sit on the backside of the COLREGs pecking order, we often have to present approach, typically by having to show in the direction of shallower water. Should you hadn’t deliberate for any deviation out of your monitor, your bubble of consciousness shrinks shortly and considerably and you’re again to probably being mounted to a display screen and feeling anxious and harassed.
In making a extra detailed sketch map with topographical components, navigational marks, transits, your route and the tide heights, you’ll grow to be conscious of a lot extra data, and consequently a wider vary of parameters in which you’ll be able to function. You’ll be able to incorporate data from plenty of sources to create as detail-rich a plan as you need.
Moreover, the method of drawing issues out and planning your route inside it situates all the pieces in relation to one another. That is much more useful if it’s going to be an evening entry. It additionally embeds the element into your mind properly sufficient so that you just don’t must study something new as soon as on the water, simply be reminded of it.

Sketch or hint out the land, drying heights, rocks and navigational marks
No matter occurs, your bubble of consciousness stays on the far edges of what you’ve drawn in your web page quite than what’s on the display screen on the time.
Beginning your sketch map
The beginning level is identical as for any pilotage plan. It’ll take you a little bit longer, however in all probability not more than one other 5 or 10 minutes. I at all times begin with pilot books, a chart and more and more the web to lookup harbour web site data, and a rising variety of apps additionally provide detailed recommendation.
Beware that a few of this data is ‘crowd-sourced’ and there of unknown provenance, whereas different, comparable to Imray’s Explorer app consists of data from the pilot books and has been verified.
If you’re fortunate, a pilot guide can have a suitably sized chartlet you can hint round. I at all times hint as a result of I’m hopeless at drawing and also you do must get the angle proper otherwise you’ll wrestle to suit issues into the fitting place. As I virtually solely plan utilizing digital charts, I discover {that a} piece of Perspex over my iPad display screen stops the display screen responding and the fantastic thing about that is I could make what I’m drawing match the dimensions of my paper.

Utilizing a tide app makes it straightforward to notice down hourly or half-hourly tidal heights
Hint the map
First, I hint the land (it’s the simplest to match again up if the paper shifts). Then hint the drying contour strains, rocks, different pure hazards and put in buoys and marked transits, even when I don’t suppose they are going to be related to my plan.
I embody mild traits if there may be any likelihood it could get darkish and embody sector lights as they’re often seen in daylight and might be helpful.
Know your limits
I then return and select the related depth contours (those closest to my draught + security margin on the lowest peak of tide on the time of pilotage) and draw them in. These are key as a result of if I deviate from my supposed route, it’s this data that turns into very helpful.

You could want multiple sketch to cowl the element of your strategy and entry. They distill lots of data very merely
Bear in mind, by doing this you’re studying the lay-of-the-land and also you’ll discover far more. It will assist with the decision-making means of how you’ll route your self into the port. You at all times need to be able when afloat to know whether or not, draught-wise, you possibly can safely enterprise right into a sure spot.
Plan your route
As soon as I’ve the topographical data in place, I’m going on to plan my path to resolve what I’m going to make use of to navigate my approach in, be it established marks or one thing I need to decide myself.
A standard limitation is to solely put the navigational marks in that you just plan to make use of. All marks are nice reference factors so do embody them. Lastly attract your course / route strains with arrows and embody bearings.
These strains are actually helpful to orientate you to the course you will want go at every subsequent flip, and even to look, which typically may not be as apparent as you suppose. Bear in mind, whereas a chartplotter would possibly counsel the quickest route, you would possibly select a barely longer one with straight programs and sharp corners to be able to use a set headmark, transit, a simple compass bearing (nearest 5º), or to leap from one buoy to the following.
It’s so a lot simpler to orientate your self and keep on monitor in case your precise route is outlined by what you possibly can see in the actual world quite than a wiggly line on a digital display screen.

Justin by no means reuses previous sketch maps, as particulars comparable to tidal peak can dramatically change your plan, and the method of pondering issues by way of is the vital a part of the train
Calculate forward of time
One key rule I observe is, no matter is on my sketch map web page have to be instantly helpful and never require me to must do ‘one thing’ with it. For example I don’t embody lats and longs as a result of I’d must plot them. I additionally at all times write tidal heights out at hourly intervals.
If I simply had excessive and low water instances and their heights referenced, I’ve acquired to do some calculations. It’s a lot simpler to do the calculations forward of time. I end with every other related helpful data that I would want to seek out in a rush – VHF channels for the harbour and marina, anticipated tidal stream and so forth.
Think about the route
The ultimate step is to have a superb take a look at your sketch map and picture your self travelling by way of it from begin to end: successfully, create your plan and type a method on how you’ll enter the port. Don’t simply take into consideration navigation marks, the bearings between them and distances to journey.

Stroll by way of the path to test for any oversights. Including color can even assist make sense of issues shortly
Take into consideration how you need to use something and all the pieces to give you additional assist to know the place you’re. As you do it, add additional element as vital or make issues a little bit extra apparent if you want to. However don’t over do it – the extra you add the much less clear it will likely be. You need your sheet of paper to have the ability to shortly reply any questions you may need on the best way in.
Importantly, you need to develop an understanding of your choices beforehand and at every stage know what you need to do. Typically, when you’ve completed, it’s shocking how simple all the pieces will appear and feel.
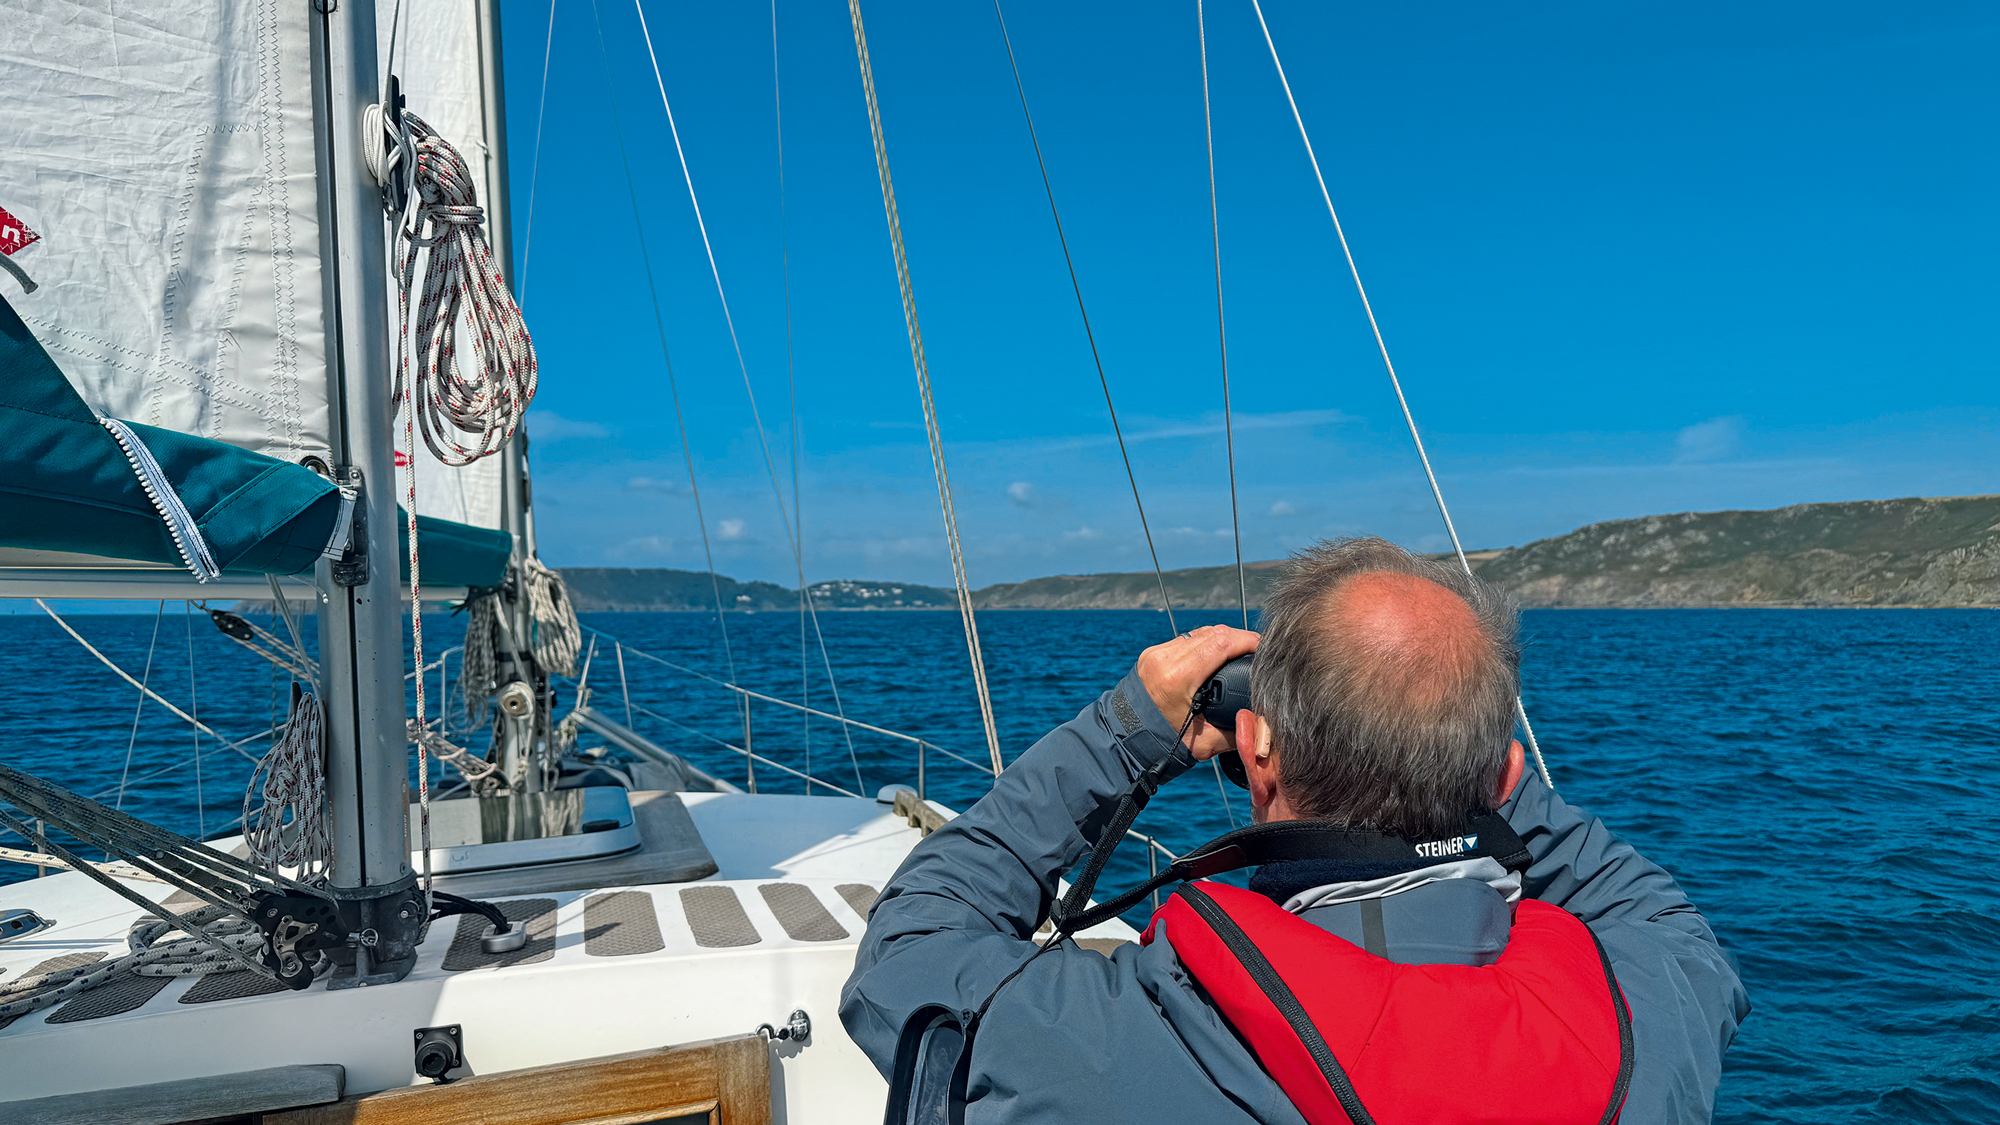
Had been something to occur to your electronics you might have a backup, however crucially it’s simply good seamanship to not depend on a single supply of knowledge. A spot depth and a compass bearing can verify that you’re the place your plotter says you’re.

Begin Level is among the main headlands of the English Channel with the potential for critical overfalls. Picture: makasana photograph / Alamy Inventory Picture
Placing it into follow in Salcombe
For this text we selected Salcombe. It’s a well-liked vacation spot and though just a few hours away, I hadn’t visited for just a few years.
I believe the entry is sort of fascinating because it’s a kind of ports the place so long as you get the fundamentals proper, it’s fairly simple.
Salcombe is thought for its bar which is de facto solely an issue (for many) round low water springs or in a robust southerly wind. There will also be robust currents within the channel which implies a little bit additional focus is required when turning round and mooring up.

A day sail from Dartmouth to Salcombe must be simple, but it surely’s nonetheless vital to think about the affect of tidal peak, stream, wind and different components
From Dartmouth, I’ve to cross the headland at Begin Level, so it was timing this accurately that was crucial factor to get proper on this journey. The entry time must modify accordingly. As my journey was deliberate for just a few days after neaps and with a light-weight wind from the north east, the entry was going to be effective no matter time I arrived.
Bear in mind, the sketch map is de facto solely simply that, a map and a approach to keep in mind the topography. You continue to must have a plan or technique. For me, this often splits into three components: the strategy from seaward, the detailed pilotage workings and eventually, the place I’m going to moor up or anchor.
I at all times begin with the one which appears the trickiest (so I’m at my freshest). On this case I felt it was the half from the outer bar into the principle channel but it surely’s laid out under in chronological order so it makes extra sense.

Rounding Begin Level might be calm as something, but it surely will also be fierce for 2 or extra miles out to sea
Method choices
When coming into the bay from the east I’ve acquired a few choices. I can purpose for the opposite headland (Bolt Head) till I decide up the distinguished, well-documented transit (given as 000°) and switch north; or attempt to intersect it someplace earlier than I get to the bar. Distance-wise there isn’t a lot in it however there are professionals and cons to each.
Persevering with in the direction of Bolt-head, a light-weight north-east wind retains me on a broad attain, which is sluggish. As soon as I get to the transit, it’s unlikely that I’ll have the ability to sail north so I’ll be motoring (which does have it’s advantages as a result of I’ll have much less to do) however that’s the tip of my crusing for the day.
The transit can be fairly near rocks and will my engine not begin, I’m fairly near a lee shore. I’m not too frightened about that as a result of I can tack and head away on a attain, but it surely’s nonetheless a unfavorable to depend.
The opposite choice is to harden up and attempt to hit the transit earlier than the bar. The positives are it’s a less complicated sail for longer. The unfavorable is I gained’t have the ability to see the transit for fairly some time so might do with some boundary strains to funnel me in the direction of the fitting place to cross the bar.

There’s no hurt in getting onto a transit as early as attainable for simplicity, but it surely may not be essentially the most elegant answer
Funnelling in
The japanese aspect of the bay in all fairness clear with all hazards inside 500m of, what’s on this present day, the windward shore. The tide is flooding – taking me north – and sadly I don’t know the speed. That is the place the tide set and drift operate in your devices / plotter is helpful however you want your log and heading sensor to be calibrated correctly to have the ability to belief the readings.
Distances are actually exhausting to guage at sea so if there’s a first rate depth contour, it’s a lot simpler to make use of that as a boundary. On this case, the 20m contour goes in the fitting course at about the fitting angle. A parallel course of about 300° will take me in the fitting course and if the depth shallows under 20m (plus tide), I’ll know I’m being pushed too far north. Luckily, I solely must bear away to get to deeper water.
When I’m due east of Bolt Head, the 20m contour veers off west and the water then shallows fairly uniformly in the direction of the bar.
Transits aren’t at all times straightforward to select, which is the place pilot books can present useful recommendation and pictures
Pondering Forward
Due east of Bolt Head can be in regards to the time I’ll have the ability to see the entire transit for the primary time as a result of the cliffs can have obscured my view of it till then. As soon as I’ve positively recognized it I can chill out a bit however nonetheless must suppose forward.
At this level with about 3/4 mile to run (about 10 minutes) to the bar, I’ll need to take into consideration getting my sails down. As I’ll be away from the transit and in additional sheltered water at this level, it’s about pretty much as good a spot as any to get them down.
It then seems to be like a fairly clear run in the direction of the bar. The depth reduces step by step from 20m down in the direction of 5m and it’s solely on the 5m contour that I have to be cautious. I can angle my approach in, monitoring the depth and ideally attempt to choose it so I arrive on transit simply earlier than the bar. What’s vital is the transit isn’t my solely reference level.

The Nationwide Coastwatch Institute lookout at Prawle Level, to the west of Salcombe, is at all times pleased to present you a radio test on VHF ch 65. Picture: Paul Gibbins Pictures
A step by step shallowing depth is to be anticipated and there may be plenty of water up till the transit.
That adjustments as soon as I arrive on the 5m contour. At that time I actually need to be near the transit, not as a result of there isn’t room to the east, there may be, however it will likely be exhausting to work out how distant from it I’m. Being near the transit additionally leads me in the direction of my subsequent mark.

Salcombe Bar in a south easterly might be all however impassable. Observe the shallow areas proven by breaking water
Over the bar
The transit takes me over the bar at what appears to be one of many deepest components (1.4m). If I keep on the transit I then shouldn’t miss seeing a purple port-hand buoy 50m to the left of me on the level the place the cliffs appear the closest.
An issue I may need is different boats both coming into with me or leaving. All might cease me utilizing the transit and, in that case, I might want to preserve to starboard. If I do get pushed off the transit to the fitting (east) between the bar and the purple buoy, I have to be cautious that I don’t get caught up in the remainder of the bar (named ‘The Bar’ on the chartlet) on the japanese aspect. However how you can determine if that’s taking place? The Bar is simply 40m from the transit which isn’t a lot (two boats passing one another can dissipate 20m).
Because the Bar’s depth is given as 1.5m and the 2m contour is outlined north/south, I’ve a straight-forward depth boundary. I might simply calculate the depth I’d see if I crossed it and head to port (west) or decelerate as vital.

Your sketch chart will assist you know the way a lot wiggle room it’s a must to deviate. A fast clearing bearing or depth contour can set limits to point out you while you’re protected
Nevertheless, I could make issues a little bit less complicated and extra assured. As I’ll need to know when I’m crossing over the principle bar anyway, I’m going to be watching the depth like a hawk. As the 2 bar depths are so related (inside 10cm), and, assuming they haven’t modified, all I must do is notice the shallowest depth I see once I cross the principle bar and notice that peak.
What’s higher is I’m utilizing the precise peak of tide on the time quite than the expected peak. I then use that as my ‘don’t-go-any-shallower-than’ depth for the right-hand-side as I head north. All of that boils all the way down to: between the (outer) bar and the primary purple buoy, I don’t need to let the depth get any decrease than the shallowest depth I noticed once I crossed the bar – deeper water will at all times be in the direction of the transit.

Some plotter apps, like TimeZero’s TZiBoat, allow you to spin your view and use 3D elevations to make visualising the pilotage a lot simpler
Making the Flip
Wanting roughly 055° from the primary (most southerly) purple buoy, there must be a line of inexperienced buoys over to the fitting marking the right-hand aspect of the channel because it turns north-east. The chart additionally provides a number one mild bearing of 042.5° which is definitely on the incorrect aspect of the channel for coming into the harbour.
The bearing is ok, simply not the bottom monitor. As I’ll want to remain proper to maintain to the proper aspect of the channel anyway, it’ll pay to attempt to go away the transit as quickly as I can and cross to hug the inexperienced buoys. I’ll need to keep away from staying on the transit too lengthy and for a line of boats to really feel it’s okay to chop the nook and go between me and the greens and cease me crossing over.
The opposite vital factor to notice is the channel isn’t very vast and there are just a few nasty-looking drying rocks near the channel edges. It’s value ensuring they’re all marked on my sketch map so I’ve a good suggestion of the element.

A quiet day afloat is straightforward, however even in calm circumstances, plenty of boat visitors could make staying on target and recognizing buoys tough
Into the (sea) ‘weeds’
From the chart, it seems to be like I need to preserve the very first purple to port as a result of it marks an enormous rock (+0.8m). As soon as the primary starboard mark is due east (suppose in compass factors which don’t change, as phrases comparable to ‘off the beam’, ‘off the quarter’ change with boat angle), there may be fairly a little bit of clear water to the north and west of the primary purple but it surely doesn’t have a transparent boundary.
I might use my famous shallowest bar depth right here too if vital. The closest rock I might hit in that space has the decrease most important red-and-white transit publish protruding of it which I’ll have already seen. There’s additionally a rock between the primary and second inexperienced buoys the opposite aspect of the 2m contour; and there’s a little room between the second and third inexperienced buoy. Helpfully, the rock between them is marked by a set inexperienced and white publish (so is totally on station).
The ultimate two marks within the channel are a purple and white publish and purple buoy that I need to not go north of on the opposite aspect of the channel, and that’s it. I’m then safely into the principle channel.

Tied up safely alongside the customer pontoon with the wind blowing the boat off for a quiet night time. Salcombe is not far away to the fitting of the shot
Discovering a mooring
The Harbour Information and pilot books state that Salcombe might be very busy so it’s good to have an concept the place you need to moor and likewise a backup location. I hope to attempt to moor on the customer’s pontoon in ‘The Bag’, across the nook from the principle city quay because it’s extra sheltered.
I ought to nevertheless, preserve a lookout to see what mooring buoys can be found as I cross them up the principle channel and be ready to return again and raft if vital. The very last thing to consider is to double test what time the tide goes to show and take a look for good areas to show round in as I’m more likely to be arriving round full flood (albeit neaps).
In an ideal world, I’d need to favour port-side-to on the western aspect of the guests pontoon (in The Bag) so I’m being blown off.

Mooring in ‘The Bag’ provides all-important shelter from the SW
A closing notice
Please don’t be postpone if, when studying the entry technique part of this text, it looks as if an excessive amount of exhausting work. It’s a lot tougher to learn and to observe than to work out for your self. If nothing else, it’s going to hopefully offer you an concept of the extent of element I’m going into when coming into an unfamiliar port or when doing a little bit of tough pilotage.
Do give it a go, it really works. Additionally don’t neglect, though your entry technique and the sketch map can be utilized alone, you must also have a chart plotter, whether or not it’s in your cellphone, a pill or a devoted unit. What this course of does is make you extra conscious of your environment and permits you to retain far more data. Consequently it provides you higher instruments to make and execute a very detailed plan.
As you’re heading in, your plotter then solely wants to verify your place for you. Importantly that is inside an space you’re actually acquainted with and at a time when you understand what you are attempting to do. With each ‘methods’ working along with one another, it truly is an extremely highly effective mixture, that makes for a lot simpler and far much less aggravating pilotage.
You’ll know if you find yourself getting it proper while you arrive in a ‘tough’ port and surprise what the entire fuss was about.
Loved studying this?
A subscription to Yachting Month-to-month journal prices round 40% lower than the duvet worth, so it can save you cash in comparison with shopping for single points.
Print and digital editions are available through Magazines Direct – where you can also find the latest deals.
YM is filled with data that will help you get essentially the most out of your time on the water.
-
-
- Take your seamanship to the following stage with suggestions, recommendation and abilities from our specialists
- Neutral in-depth critiques of the newest yachts and gear
- Cruising guides that will help you attain these dream locations
-
Comply with us on Facebook, Twitter and Instagram.